How to control HomeKit with Stream Deck
It seems like an obvious use for a Stream Deck, yet while you can control your HomeKit setup from one, the solution is far from obvious. Here’s what you need to do.
Egg, chicken, chicken, egg. While HomeKit remained less successful than, say, Amazon’s Alexa ecosystem, third-party firms might only develop for Apple’s home app as an afterthought.
Hopefully this will change as Apple, and others, move forward with the Matter system that means they’ll all work together. But in the meantime, neither Elgato’s Stream Deck nor the third-party plugins it supports, can control HomeKit.
However, the very absolute basic thing any Stream Deck can do is open an app — and you can exploit that to do anything you need with your smart home.
How to use your Stream Deck to control HomeKit
It doesn’t matter what specifically you want to do with HomeKit, the process is always the same. You want one Stream Deck button to trigger at least one HomeKit light or door or whatever.
So your first step is to decide what you want to happen, and then your second step is to turn that into an app. This has nothing to do with Stream Deck yet, you are making a very small Mac app — and you do it using Shortcuts.
Start off in Shortcuts
- Open Shortcuts on the Mac
- Click the plus sign to start a new one
- Name it something like Office Light, or Kitchen Light On
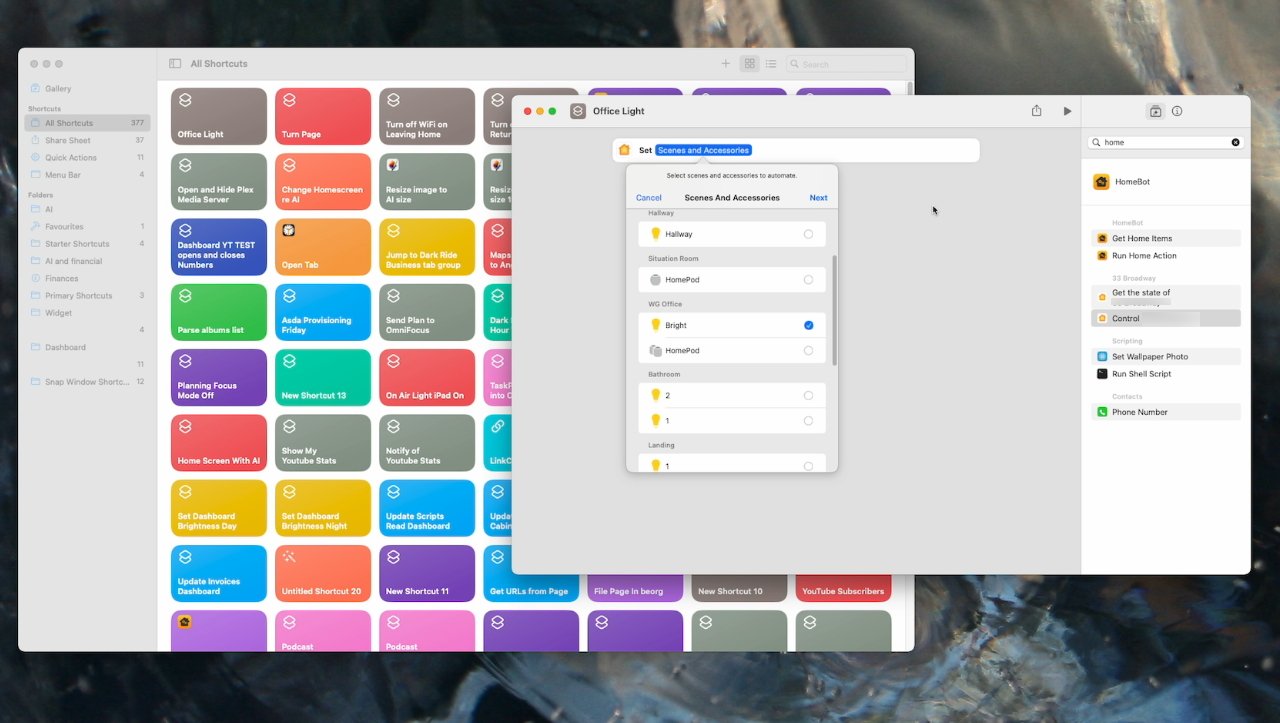
- In the Search for apps and actions box, type Home
- From the actions that appear, choose the one beginning Control and your home’s name
- In the action that now begins with “Set”, click where it says Scenes and Accessories
- Choose the room, then the light or other accessor you want, and click Next
- Click to choose whether you want the accessory on or off
- Close this new Shortcut
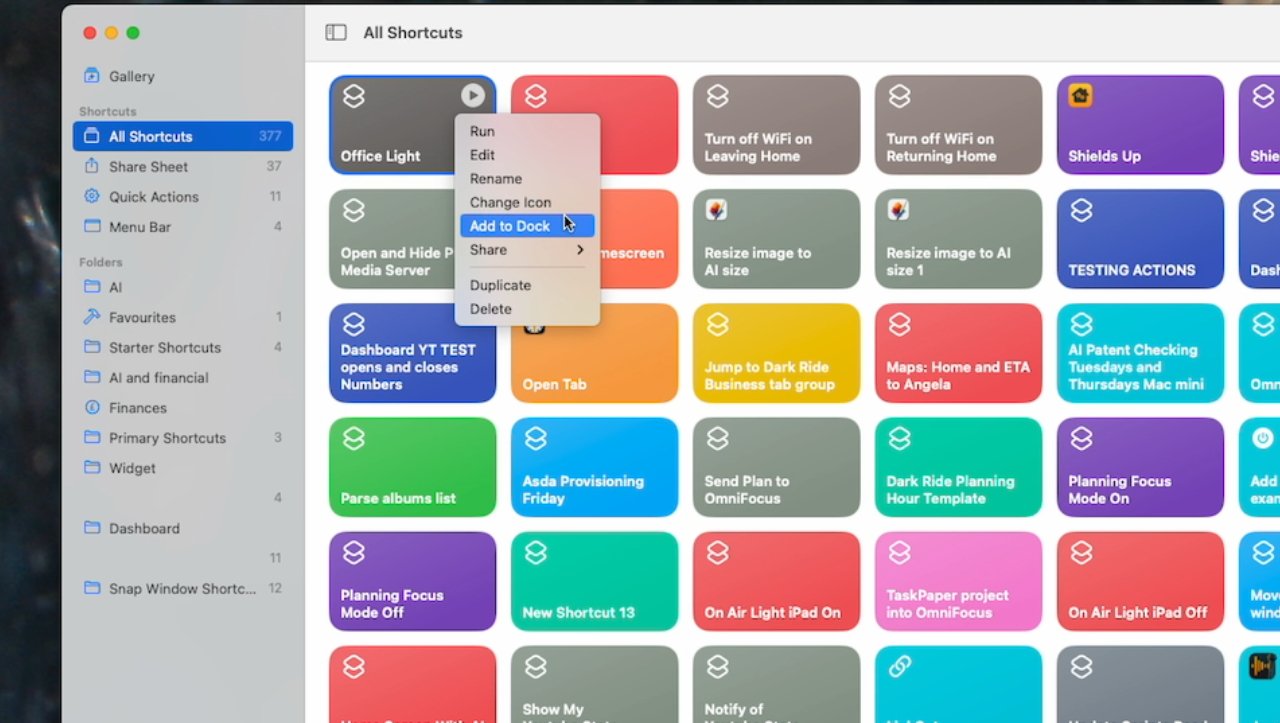
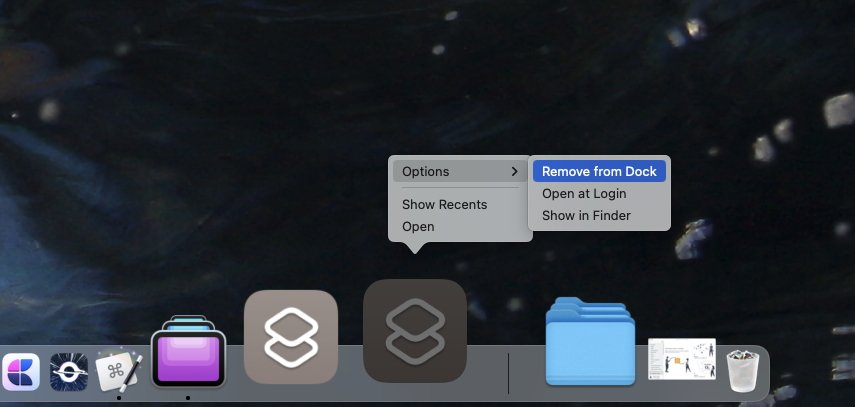
- Right click on the Shortcut in the gallery and choose Add to Dock
You’ve now effectively created a Mac app that will turn on your light, or unlock your door, whatever you’ve decided. It is an app in your Dock and the last thing you want is a dozen HomeKit apps there, but then the last thing you’ll do is remove them.
Before you bother with that, open Stream Deck, to start making the simplest version of this. There are reasons to get a little more complex, but start with the simplest.
Continue with Stream Deck
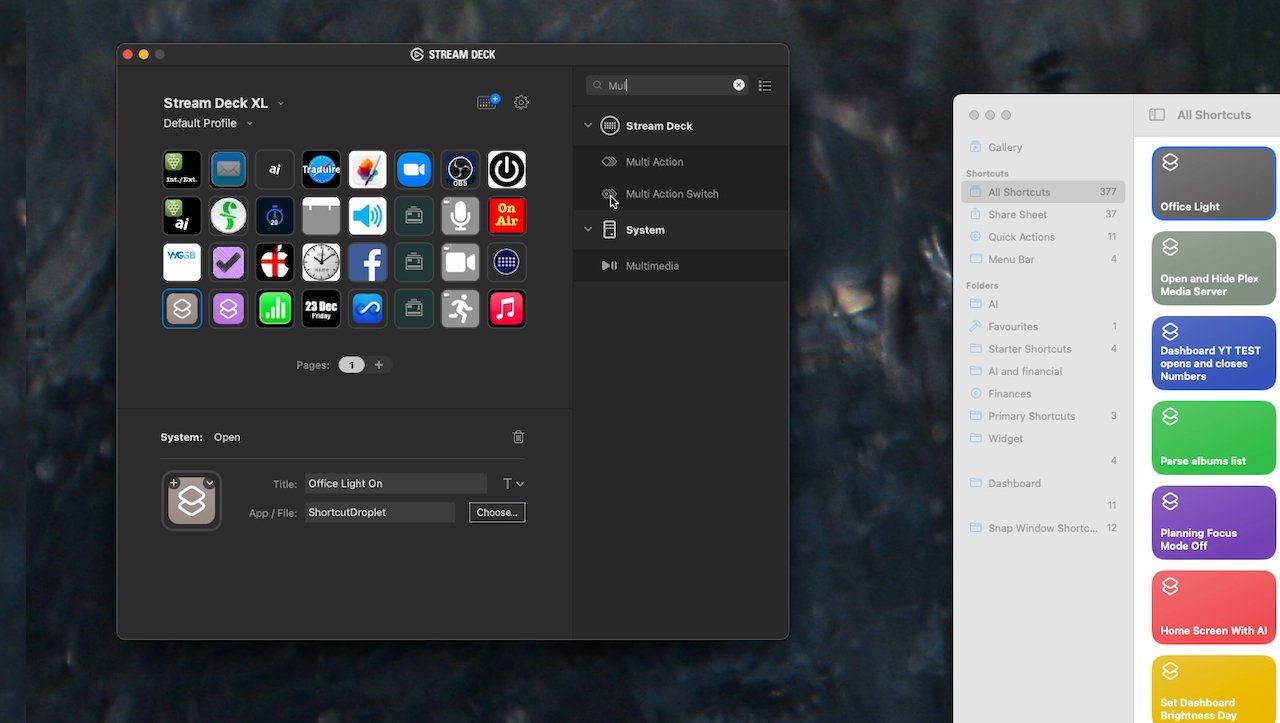
- Click on an empty, unassigned button
- In the column to the right click in the Search box
- Search for Open
- Drag the Open entry that appears, on to the button
- Click on Choose…
- Find your new Shortcuts app — and see note below
- Choose that app and you’re done
If you struggled at all doing this, it’s at the point of finding the new Shortcuts app you created. That’s because it is an application, but it isn’t saved where you usually install your other apps.
Instead, go to the top level of your Mac’s storage, then choose Users. Next, click on your name, then choose Applications. You’ll find your newly-created app there.
A basic but not very satisfactory solution
The result of all of this is that you have a Stream Deck button you can press, and your light comes on. But it doesn’t go off again when you press the same button, plus you’ve got that new app of yours still in the Dock.
Go to Shortcuts and duplicate that new app. Edit it by clicking in where it says Set followed by the name of a light, or an accessory, in your home.
Click to have it set the device to off. Then close the new app, right-click on it in the gallery, and choose Add to Dock.
You’re done with Shortcuts now, so right-click on the apps this has added to your dock, and choose Options, then Options.
Creating a more complex Stream Deck button
There’s nothing to stop you duplicating every step so far and using a new button for your off switch. But that’s unnecessarily confusing, and very soon you will find it necessary to save some buttons on your Stream Deck.
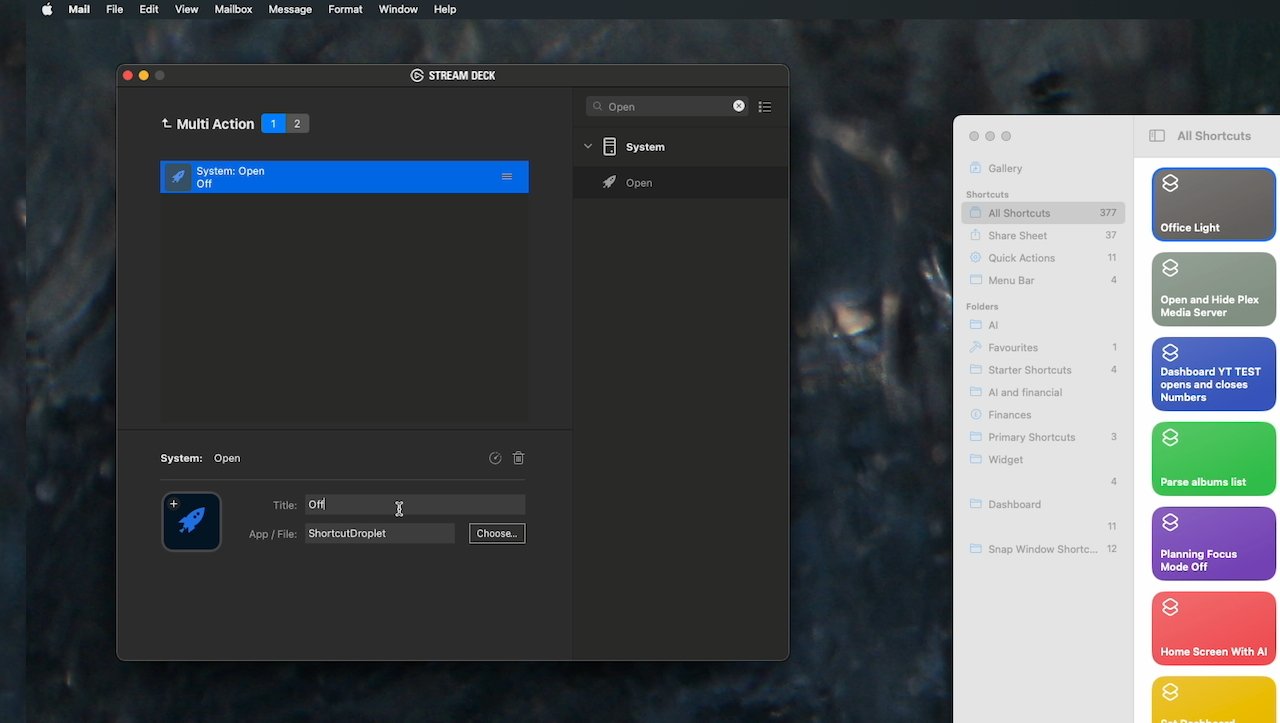
So instead, change that button you’ve created, into a Multi Action Switch.
- In the Stream Deck app, click on the button you want
- In the search box, look for Multi
- Choose Multi Action Switch by dragging it to the button
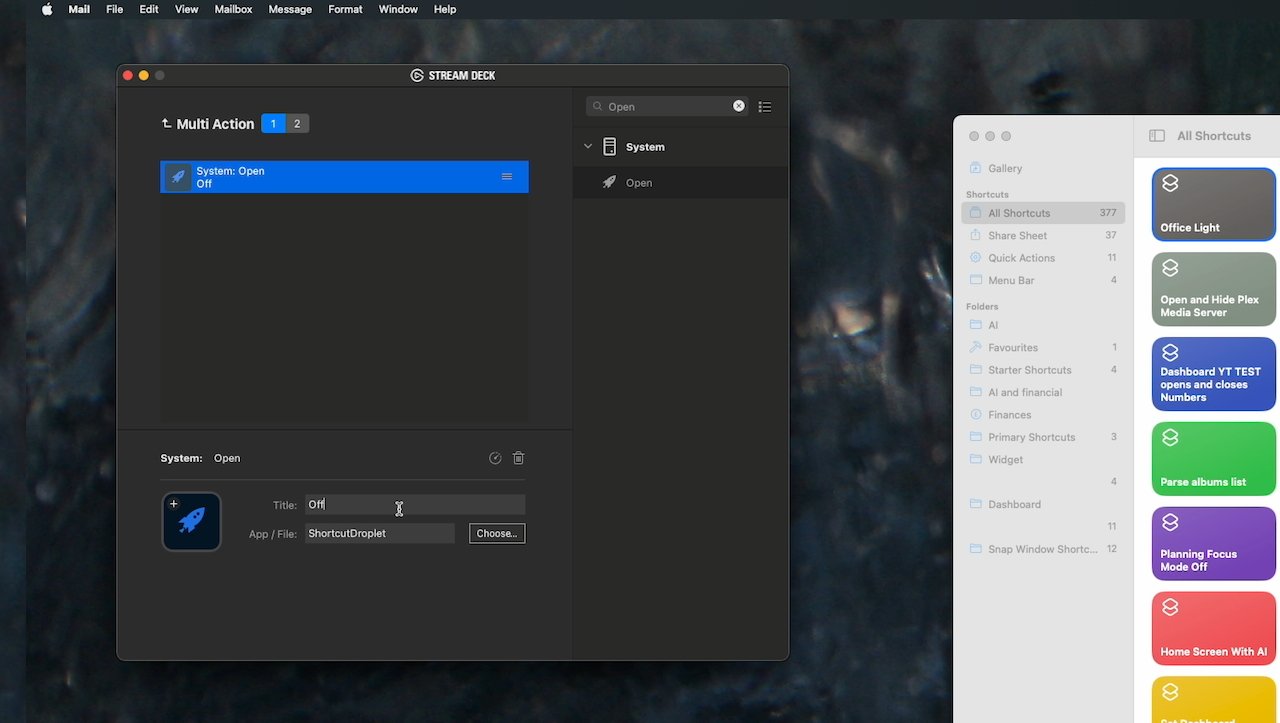
- Next search for Open, and drag that into your new Multi Action
- Click on Choose…
- Find your “on” Shortcuts app
- Choose that app and you’re completed what happens the first time you press a button
- Click on the 2 at the top of the screen, next to Multi Action
- Again search for Open
- And again drag that over to the Multi Action
- Click on Choose and find the Off app you just created
- Click at the top of the screen where there’s an arrow next to Multi Action
It works but it doesn’t look great
You’re now back with all of your Stream Deck buttons on screen, and one of them is a proper light switch. Press it once and the light can go on, if that’s what you’ve set, and pressing the same button again turns it off.
Or normally.
The way this is done, the Stream Deck doesn’t care whether your light is on or off, it just sends the on or off command anyway. So equally, it doesn’t reset if you — for instance — choose to turn off your light through the Home app on your iPhone.
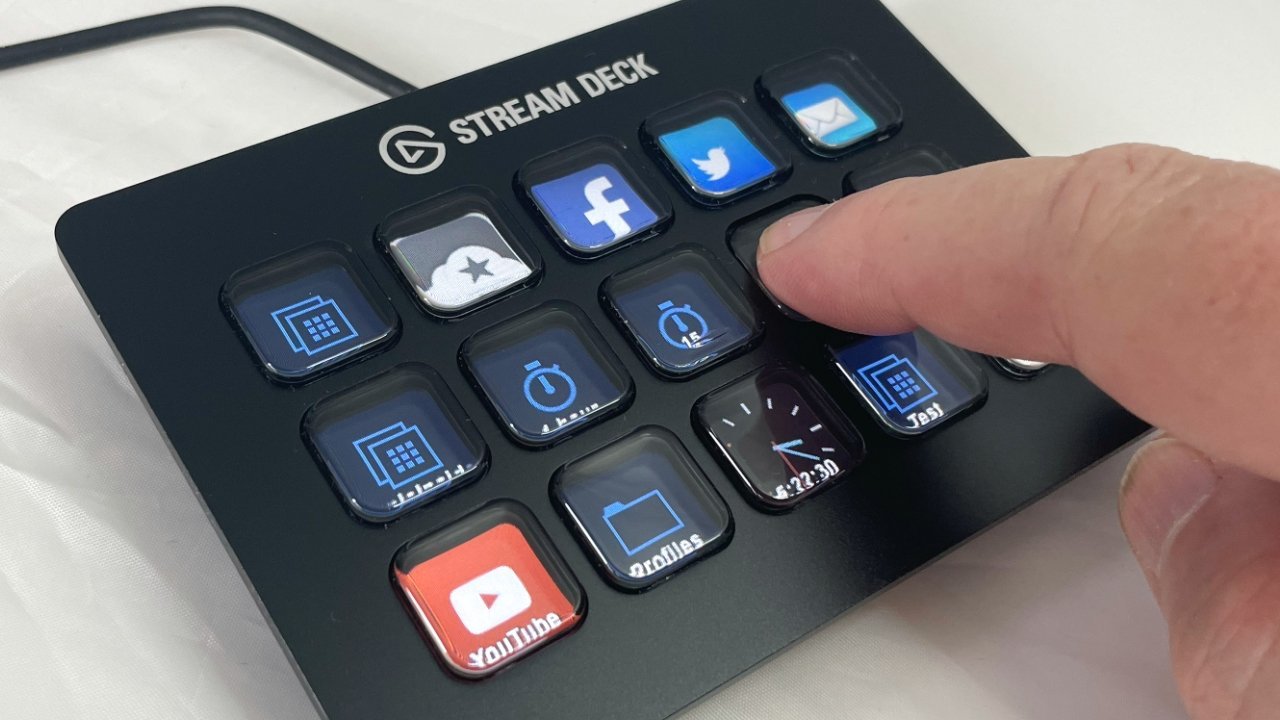
But for the most part, you now have a button — except that it doesn’t look tremendous. Stream Deck buttons are really all tiny screens and by default they display one of various little drawings that you will want to replace.
In any image editor you have, make some Stream Deck button images. Elgato recommends 72 pixels by 72 pixels in size.
Make yourself an On and an Off image. Then back in Stream Deck, click to select the button you want.
It will change to show you the first of your two multi-actions, and there will be the default image toward the bottom. Drag your new On image on top of that.
Then on the small dots beneath the image, to go to what should be displayed when the button is off. Drag that image in.
It sounds fiddly
Since you have the Home app right there on your Mac, you can argue that it’s quicker and easier to just launch that when you to do something. Except it isn’t easier and certainly isn’t quicker.
The first time you set up a Stream Deck button it will take the longest. With the second and subsequent times, it will definitely take an extended period — but chiefly because you’ll be fiddling with getting exactly the right image for the button.


