
You Can Add a Second HDMI Port to a Laptop with Raspberry Pi
After purchasing a new laptop, Pierre Couy noticed it was missing one essential feature: DisplayPort over USB-C. This prompted Guoy to make their own virtual screen streaming solution powered by a Raspberry Pi 3B.
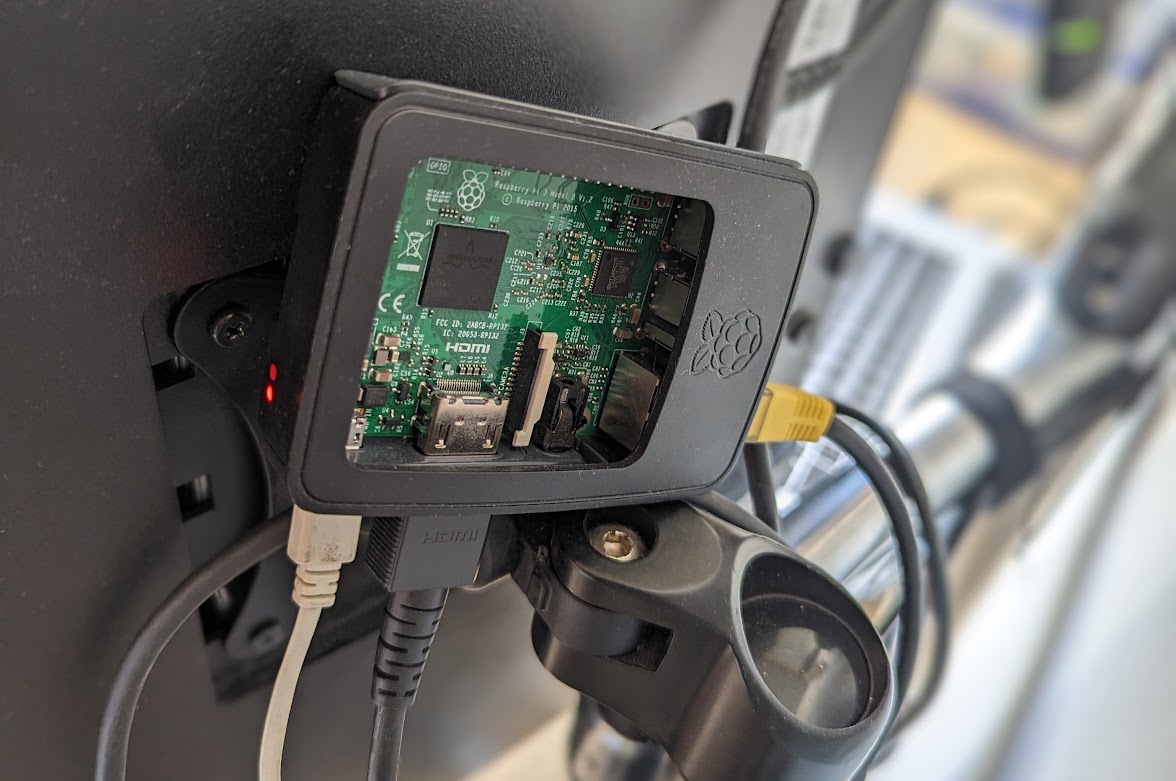
The premise is simple, stream the screen data using Ethernet to the Raspberry Pi and then output the screen via the Pi’s HDMI port. However, this project required many different processes and skills to pull off.
Cuoy’s previous laptop was able to output via VGA and HDMI simultaneously. However, only HDMI was available for their newest purchase, prompting Cuoy to dust off an old Raspberry Pi 3B and press it into services to stream an additional screen. The choice was simple as the Raspberry Pi was free, but there were some compromises which included getting the balance of picture quality, latency and framerate just right, given the 100m Ethernet port and quad-core CPU.
The goals Cuoy set were simple:
- The latency should not be noticeable when scrolling or moving the mouse
- The picture quality should be high enough to read small text
- Since I planned to mainly use it for static text content, I decided to go easy on myself by setting a low target of 10 FPS.
- If the receiving end of the stream ever gets behind, it should catch-up to live as quick as possible
- Use Direct Rendering Manager to display the stream on the Pi instead of depending on a X server.
- I looked into remote-play tools and VNC because they seemed like easy to use low-latency solutions. However, I was not interested with streaming inputs back from the Pi to the laptop.
Additionally, Cuoy wanted to set up a DHCP server on the Raspberry Pi, start the necessary software on boot, and configure the laptop to begin streaming the screen data. That last goal required the use of xrandr to create a virtual monitor.
Cuoy’s first task was to create the video pipeline and chose to use ffmpeg on their laptop. After installing a DHCP server (udhcpd), Cuoy configured the two machines to talk to one another. With the connection confirmed, the first real test was an unoptimized stream over Ethernet. The test was a success, but it failed on all goals. Undeterred, Cuoy pressed on. Finally, via a series of iterations, Cuoy was able to optimize the stream to a point where it met the goals.
The final goal was to extend the laptop display using a custom bash script that would generate a virtual monitor, configured to meet Cuoy’s needs and streamed to the IP address of the Raspberry Pi. On the Pi, another script intercepts the stream and outputs the playback via the HDMI port.
Sure, all of this is overkill; a USB DisplayLink adaptor would work just as well and with little or no work. However, the complete process is fascinating. It shows what can be achieved with cheap hardware, some Linux knowledge, and plenty of iterations.
Cuoy has a full blog post on the process, and all configuration files can be found on the respective GitHub repository.