
How to use the new StandBy mode on iOS 17
With iOS 17, your iPhone will learn a useful new trick: StandBy mode.
It’s simple — StandBy turns your iPhone screen into a little smart display while it’s charging. We’ve only been using it for a little while, but it’s already a staff favorite. It’s especially handy with the iPhone 14 Pro models since it remains visible at all times thanks to that always-on display, but you don’t need a top-of-the-line iPhone to make it work; it’s supported by all models eligible for the iOS 17 update.
Here’s how to get started using StandBy — we followed these steps on an iPhone 14 running the iOS 17 public beta.
- Step one is easy: put your screen to sleep, rotate the phone to landscape, and set it down to charge. It doesn’t matter how — wired, wireless Qi, MagSafe — it all works. Just set your iPhone on a charging stand in landscape mode, or plug it in, turn it sideways, and prop it up.
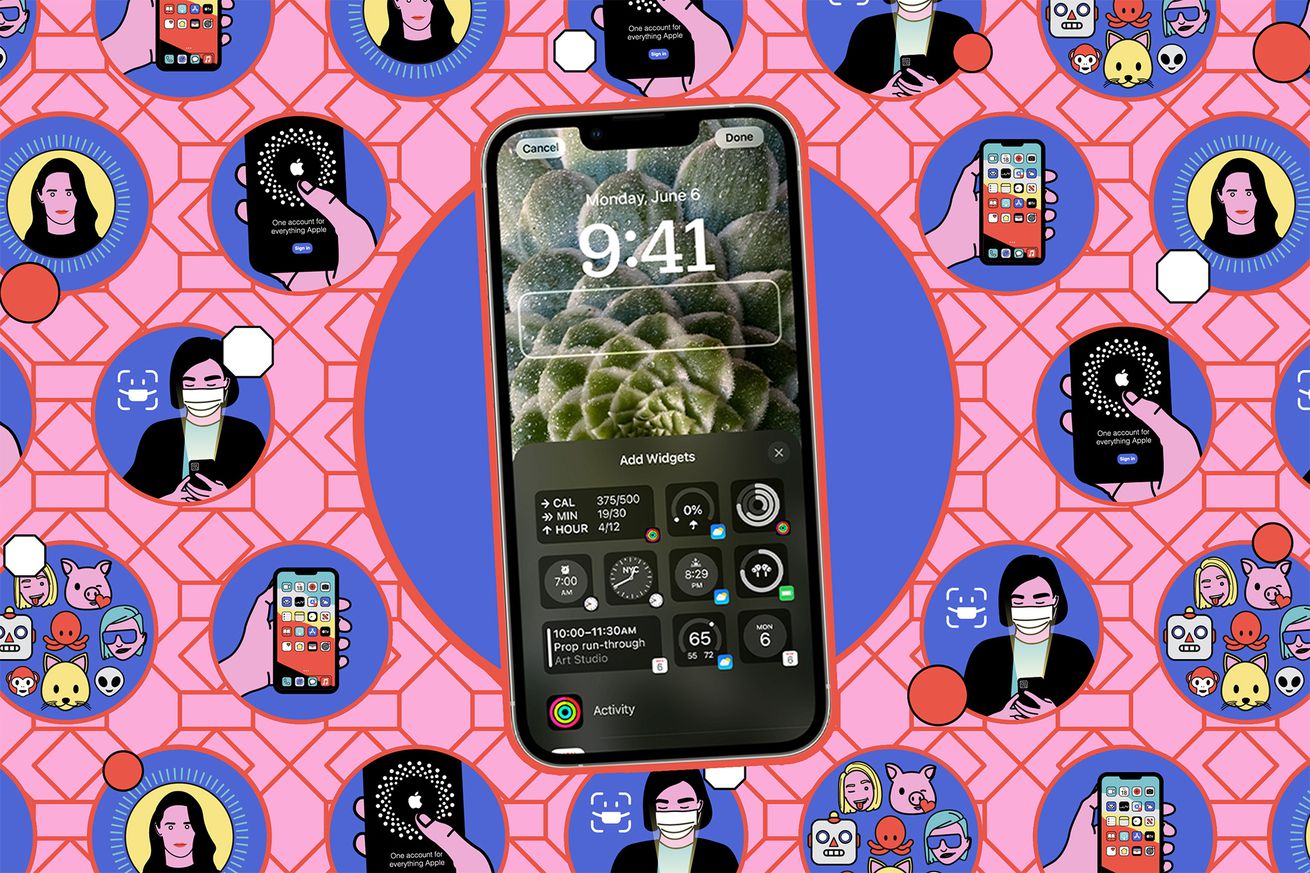
- Tap Continue when you’re prompted to start using StandBy. There’s not really a setup process, per se — you just jump right into StandBy, where you’ll find three basic options to choose from: a widget view, photos, or a clock face. You can scroll through them by swiping to the left.
- To customize the widget view, long-press either the clock or calendar and unlock your phone if prompted. From here, you can customize both sides of the display (they’re both actually just smart widget stacks). Tap the plus icon in the upper left of the screen to add a widget to the stack and remove widgets by tapping the minus icons as you would on your iPhone homescreen. By default, the phone will rotate through the widgets based on its best guess about what you want to see at a given time, but you can toggle that on and off.
- To customize the photo view, long-press the middle of the screen. Tap the plus icon in this view to select an album to show on the screen — otherwise, the phone will show the Featured Photos highlighted in the For You tab in the Photos app.
- The clock view offers five different styles, most of which you can customize. Swipe up and down to scroll between the different styles, and long-press the middle of the screen to access customization options. Tap the white circle in the lower right corner to change the color palette for the corresponding clock style.
You can also access some basic StandBy options in the settings menu.
- Go to Settings > StandBy. You can toggle StandBy off entirely here and turn off notifications with the mode enabled (they’re on by default). You can also disable Night Mode, which shifts the screen to a red tint in a dark room so it’s not glaringly bright.
StandBy also includes one more neat feature you won’t find on any settings menu: when you use this mode with certified MagSafe chargers, the phone will remember your preferred view for each individual charger. So you can set up a widget view in the kitchen and a chill clock face for your nightstand — the choice is yours.