
YouTuber Upgrades Lowest Spec Raspberry Pi 4 to 8GB of RAM
Finding a Raspberry Pi 4 in stock is still a challenge, but things are starting to look up. But what if you need a Raspberry Pi 4 8GB, now? Could you turn a 1GB model into an 8GB? Well that is what YouTuber MadEDoctor has done with a replacement RAM chip and lots of soldering.
Before we get to the meat of the story, a word of warning. You’ll have probably guessed already that this will invalidate your warranty. You will also need the skills and the best soldering stations to even attempt it. This is an extreme means to get hold of an 8GB Raspberry Pi 4, yet we seem compelled to give it a try.
| Row 0 – Cell 0 | Chip Code | Alternate Chip Code | Price |
| 1GB | SEC928 | Row 1 – Cell 2 | Row 1 – Cell 3 |
| 2GB | Micron D9WHZ | SEC940 | $23 |
| 4GB | Micron D9WHV | Row 3 – Cell 2 | $41 |
| 8GB | Micron D9ZCL | Row 4 – Cell 2 | $21 |
MadEDoctor starts out with a Raspberry Pi 4 1GB, which is shown to be working to spec. Then the fun begins. Desoldering the RAM chip requires a hot air rework station and lots of flux. Using plenty of Kapton tape to protect the surrounding chips and plastic components, the 1GB RAM chip is first heated up to 250 degrees Celsius using the hot air rework station. The air speed is set to 60% to ensure that the heat permeates into the underlying board. With the board warmed up the heat is turned up to 400 C, the temperature required to desolder the lead-free solder used in modern board production. The RAM chip is held in place using a BGA (Ball Grid Array) and so the heat needs to loosen every solder ball before the chip will yield. This can take some time, and MadEDoctor constantly touches the chip to check if it is loose.

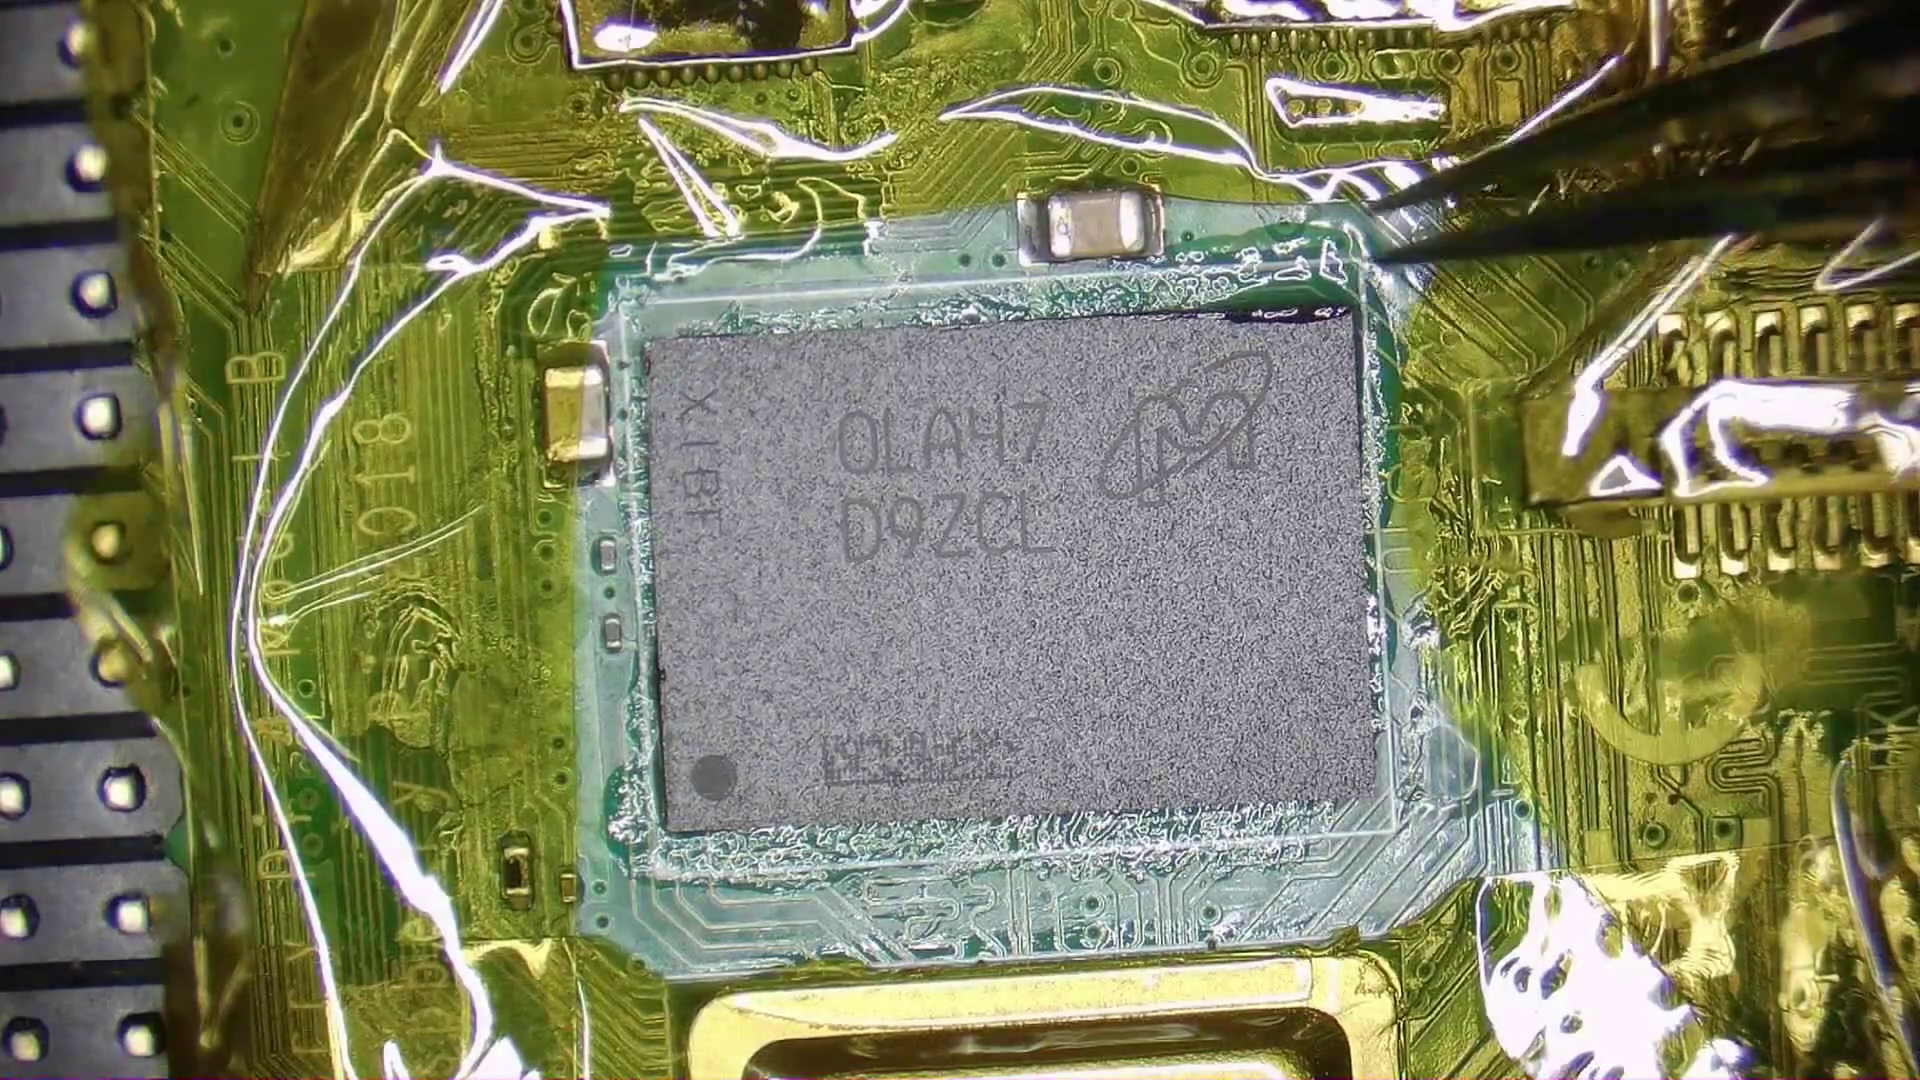
With the RAM chip removed, MadEDoctor floods the exposed pads with more flux and then uses some lead based solder to tin the pads. Using lead solder will make the clean up a little easier as it generally has a lower melting point. Out comes the soldering iron and some desoldering wick (copper braid) is used to lightly clean the pads. Never pressing hard enough to damage the board. We assure you that you don’t want to damage a pad at this level of magnification. A quick wipe with some isopropyl alcohol and a Q-tip reveals the gleaming array of pads waiting for the new chip.
Applying the new 8GB RAM chip to the board is a similar process to removing the 1GB chip. The 8GB RAM chip already has solder balls for the BGA. Flux is applied to the exposed pads on the Pi and the RAM chip is placed on top of the pads, matching the original orientation. MadEDoctor elected to replace the lead-free solder balls with lead for their chip, and so the hot air is turned up to 350 C at 40% speed. For lead-free we would need to hit 400 C and 60% air speed. MadEDoctor explains how to know when the chip is seated correctly. The general guidance is to take your time, and keep checking the chip by tapping to see how it moves.
With the soldering done, MadEDoctor leaves the board to cool, with just a gentle air flow from their fume extractor. The Pi needs to cool slowly, ensuring that every connection in the BGA is correctly made. A bad solder joint in the center of the chip would be a nightmare to diagnose.
With the operation a success, MedEDoctor runs a few rounds of memtester to ensure that the 8GB chip is working to spec. Sure, this is an extreme project, but the skills to do this are not beyond many electronics hobbyists.