How to use Homebrew on Mac to install third-party tools & apps

How to use Homebrew on Mac to install third-party tools & apps
Homebrew is a macOS package manager that lets users install and manage UNIX tools and 3rd party software. Here’s how to get started.
Unlike most UNIX/Linux-based systems, macOS doesn’t provide a standard mechanism for installing 3rd party command-line tools beyond the standard Apple installer. On most UNIX/Linux-based systems, tools are installed by a package manager in which packages can be downloaded, updated, synchronized, and removed. Most of these package managers include automation.
The best solution to this problem on macOS is a 3rd party package manager called Homebrew.
Not only is Homebrew easy to use, but it keeps your Mac tools up to date with relatively little hassle. It’s also possible to automate tool installation using scripting, but that’s beyond the scope of this article. For now, we’ll use only the simplest examples and explore more advanced topics at a later date.
What you need to get started with Homebrew on macOS
Setup is easy and requires 4 basic steps.
First, go to the GPGTools site, and download then run the GPGTools installer. Quit the installer when done. This installs the GPG Keychain app which allows you to create SSH keys which will later be used by the Homebrew install script.
GPG is an acronym for GNU Privacy Guard – but don’t worry – it won’t install any VPN or other networking software. GPGTools only installs the GPGTools app and a few incidental UNIX tools it needs. It also installs a System Settings Preference Pane.
Once GPGTools is installed, go to your Applications folder and run the GPG Keychain app. Step through the very simple first prompt – providing a name, email address, password, if you want one (it’s a good idea). This password is used only for the SSH keys the app creates. You won’t need it again unless you access the keys manually in Terminal.
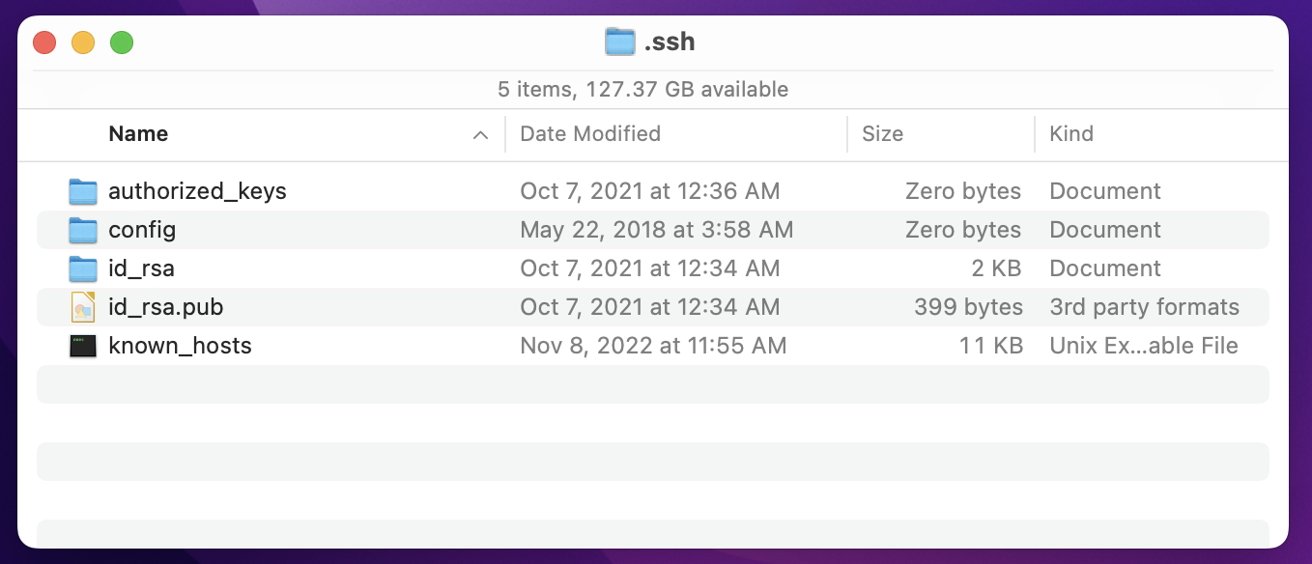
After the GPGTools app generates your keys, it stores them in an invisible folder named “.ssh” in your user folder. The leading “.” makes the folder invisible unless you do something to tell the Finder to show invisible files. In most cases you won’t need to access the keys directly:
Public Key Infrastructure, or PKI allows you to securely exchange information using encrypted signatures instead of passwords.
Note that the file id_rsa in the .ssh folder is your private key. Never give this key out to anyone or allow access to it from your Mac. The other file, id_rsa.pub is your public key and can be given out or uploaded to public key servers freely. The other files are used by the system to configure SSH.
The GPGTools app will display a window showing your new public key, and that it is valid.
Next, you’ll need to install the 3rd-party Ruby Version Manager – a package manager for the Ruby language. This is needed because most of Homebrew and its install scripts (called Formulae) are written in Ruby. It also installs the verified keys for GPG itself. This is fairly easy. The RVM site lists this step right at the top. Open the Terminal app on your Mac from /Applications/Utilities and copy+paste:
gpg2 ––recv-keys 409B6B1796C275462A1703113804BB82D39DC0E3 7D2BAF1CF37B13E2069D6956105BD0E739499BDB
Press Return to execute the command.
This tells GPG to retrieve the GPG official keys from a verified public key server. You’ll see a few lines of text as the keys download. It should complete fairly quickly:

Note that if you are logged in to your Mac as a non-admin user, you may need to preface each Terminal command with the sudo command. For example:
sudo gpg2 ––recv-keys 409B6B1796C275462A1703113804BB82D39DC0E3 7D2BAF1CF37B13E2069D6956105BD0E739499BDB
sudo, or “super user do” is the UNIX tool to run another command as the “super user”, also sometimes called the root user. The super user has nearly unlimited power to do anything on a UNIX system so use it carefully. You may be prompted for your macOS admin password. If you’re logged in to your Mac as an admin user, you likely won’t need to preface Terminal commands with sudo.
You can use all four arrow keys on your keyboard to navigate backwards or forwards in Terminal.
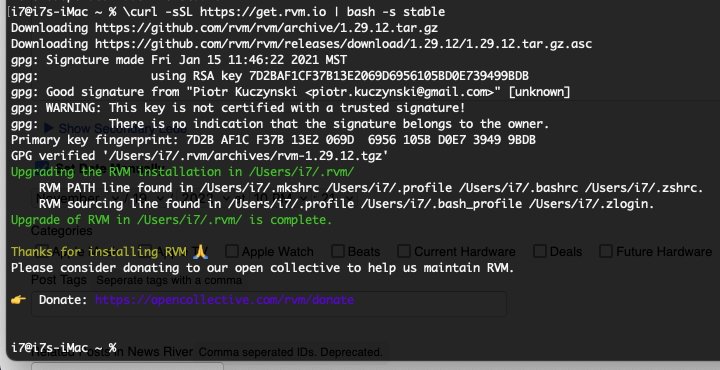
Next, run the 2nd script line shown on the RVM website in your Terminal app by copy+paste:
curl -sSL https://get.rvm.io | bash -s stable
and press Return.
This uses the UNIX curl download tool to install the Ruby Version Manager to your Mac. Ignore the warning about the key not being certified. When it finishes, the install script will mention a few advanced UNIX setup items, but you can mostly ignore them unless you plan on using Ruby directly. You can also re-run this same comand in the future to update RVM to the latest version.
In Terminal you can cancel the execution of any running command by pressing the Control-Option-Z keys simultaneously.
You can verify the RVM + Ruby install in Terminal:
ruby -v
and
rvm -v
Now that that preliminary setup is done, you’re ready to install Homebrew itself. As stated on the homepage, copy and paste the following into Terminal:
/bin/bash -c "$(curl -fsSL https://raw.githubusercontent.com/Homebrew/install/HEAD/install.sh)"
and press Return.
This tells curl to retrieve and execute the Hombrew install script from its GitHub repository online. The first time the script runs you may be asked for your macOS admin system password in Terminal. Enter it and press Return. Follow the rest of the on-screen prompts.
The Homebrew install script will download and install everything Homebrew needs. Follow the on-screen prompts. It may ask for your Mac admin password. It shouldn’t take too long. When it completes, you’ll get a few notes from Homebrew, most of which can safely be ignored.
Installing Tools
After Homebrew installs, you’re ready to run your first Homebrew, or simply brew, command in Terminal:
brew install wget
wget is another GNU download tool similar to curl. wget is common on many Linux and UNIX systems.
That’s it. That’s all there is to installing Homebrew and a tool.
Each time you install a Homebrew-hosted tool, you enter “brew install (formula name)” in Terminal, where (formula name) is a Homebrew formula name it recognizes. Each tool gets installed via a Ruby script (the formula) which it knows how to download and run. It also knows how to install any formula dependencies.
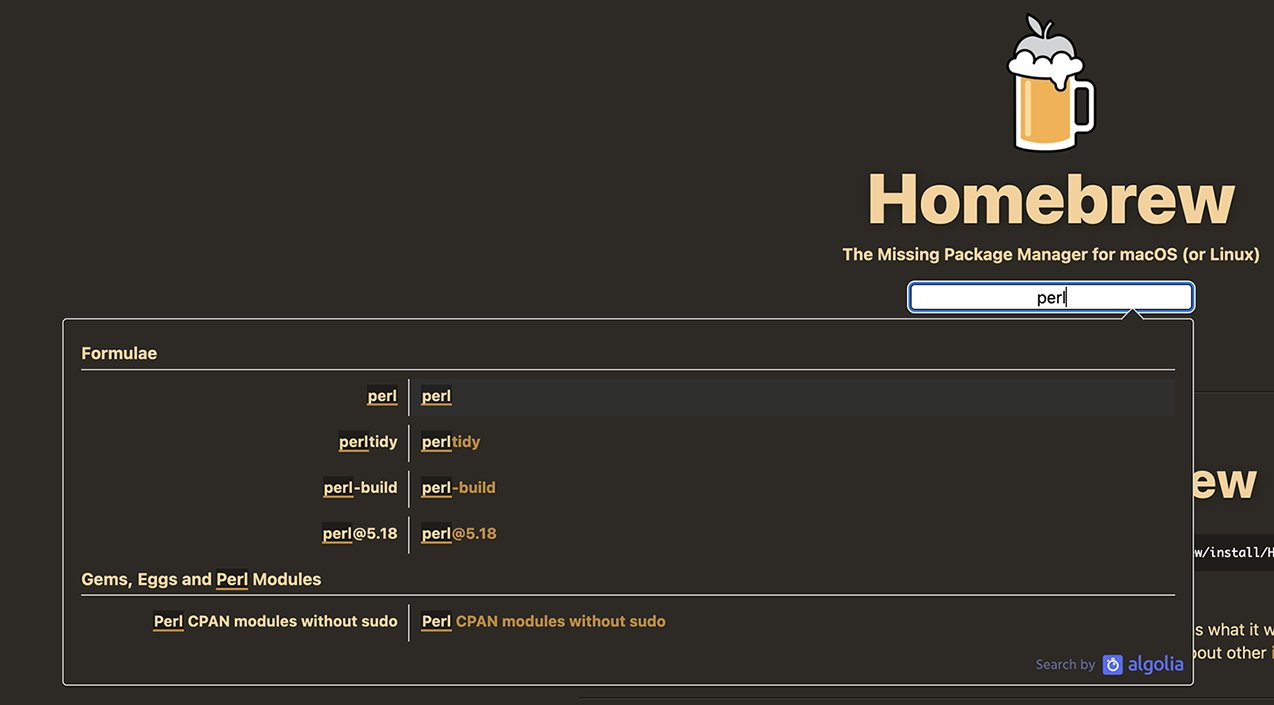
You can search for any tool name on Homebrew right at the top of the homepage. Simply type the tool name into the search box and it will show a popup with all matching formulae. Click a formula name to see its page and its brew install command. For example if you wanted to search for the Perl package, go to www.brew.sh, and in the search box type “perl”. You should see:
As a side note, most Homebrew packages get installed into the invisible system directory /usr/local, into a subfolder called Cellar. symlinks are created to each tool into a UNIX binary (bin) directory where they can be seen by the system. symlinks are UNIX’s equivalent to macOS desktop aliases.
The Homebrew collective is quite good about adding new tools as they come out, and updating existing formulae. There is also extensive documentation and a forum.
Keeping Homebrew Up To Date
There are a final few commands you should know to automatically update any formulae you have installed, and Homebrew itself. These are:
- brew help – general help about Homebrew.
- brew commands – show common Homebrew commands.
- brew list – shows all installed Homebrew formulae.
- brew upgrade – checks the Homebrew install script for a new version and installs it if available.
- brew outdated – Show any formulae that need updating.
- brew uninstall – remove the indicated formula from your Mac.
And finally, the all-important formulae update command which you will want to run often, if not daily:
brew update – update all outdated formulae on your Mac.
Be aware if you have a lot of formulae installed, brew update can take quite some time, even over fast connections.
If you’re really feeling adventurous, you can view the entire core Homebrew formulae list.
Homebrew Casks
In addition to command-line UNIX tools, Homebrew also allows you to install some standard Mac apps via its cask flag, which is very similar to the regular install command. For example, to install Mozilla Firefox simply type:
brew install ––cask firefox
The Homebrew site also has a full list of available casks.
Most cask app installations get installed into the usual Applications folder. It’s also a good way to keep several apps up to date at once by running brew update.
Which Versions?
Once a tool is installed with Homebrew and visible to macOS, you can find out where it lives in the system by using the which command followed by the tool name. In Terminal, for example, type:
which wget
and press Return.
You should see:
/usr/local/bin/wget
This works in general for all UNIX system tools.
If you know the version flag a tool supports you can also get its version in Terminal. Most UNIX tools use either the tool name followed by the -v flag, or the ––version flag. For example:
wget ––version
Returns:
GNU Wget 1.21.3 built on darwin21.3.0.
Most tools include a paragraph or so of info after the version info.
For specific commands supported by each tool use the UNIX man (or manual) system:
man (tool name)
For example:
man wget
returns:
NAME
Wget – The non-interactive network downloader.
SYNOPSIS
wget [option]… [URL]…
followed by pages of commands and their options.
Type Control-Z to exit the man system.
So much more to Homebrew
Now that you know how to install, update, and use Homebrew, you can install just about any popular UNIX tool package out there.
In future articles we’ll explore some of Homebrew’s more advanced commands. And, we’ll talk about how to use shell scripting to write a master install & update script to automate entire install sets at once.